Hi everyone!
This recipe is one of my FAVORITE foods of all time! I literally sit down when I finish baking this and almost eat all of it (my mom usually comes in and pries me away from the pan before I can finish…). I haven’t been able to find anything remotely like this in North American cuisine, so I hope you find this unique treat as lovely as I do!
First of all, you’re going to need to buy one special ingredient: poppy seeds. No, not the typical ‘dry’ poppy seeds you can find anywhere, but special poppy seeds called poppy-seed mass (with delicacies). I’m pretty sure the generic name for this is poppy-seed paste or filling. You will probably be able to find them in any slavic store; and if not, I will most likely post up a recipe on how to make your own (but this will be relatively far in the future; I’m still experimenting with it).

This what the can I used looked like.
I only used about 1/4 of the can for one recipe. You’ll have plenty left over to experiment with or to eat plain! Trust me, it’s very good.
Now that you have the one special ingredient required, we need to start making the bun part of the recipe.
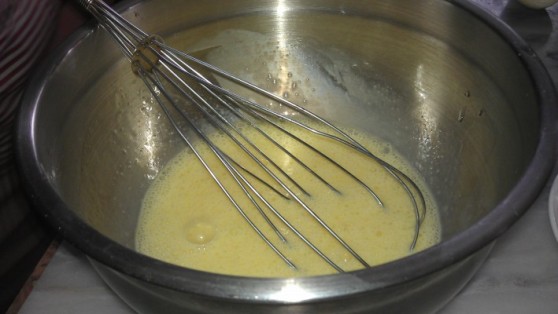
Combine: room temperature milk, eggs and yeast and let stand for a couple of minutes.

Mmm…
After, add in the rest of the ingredients and knead until the dough forms (I used my kitchenaid mixer to make life easier).

Greased and ready to rise!
Grease the bowl the dough is in, cover and let rise for an hour. After an hour, beat down the dough and let rest for 10 minutes.
Here comes the fun part! Cut a portion of the dough off (about 1/5) and roll it out to about 1/4 inch thickness. Brush the top part of the dough with a little bit of oil and then generously cover it with the mak (poppy seed).

This should be a nice rectangle, but who in the world is perfect?
Roll the dough up into a tube and cut out equally size portions of the buns (they look like Cinnamon buns!).

They are on top of my… HANDY-DANDY SILICON BAKING SHEET!
Place the raw poppy-seed bun into a greased pan, cover and let rise for at least 30 minutes. But, you can totally let it rise for longer; judge it yourself: the dough should be visibly fluffy.
After the dough has risen, pop it into the oven!
While the buns are baking: make the lemon-sugar glaze.
I hope you enjoy this yummy, yummy, YUMMY bun! I like it in ‘cinnamon bun’ form the best because I get the maximum amount of mak to eat.

-drool-
Recipe
serving: ~24
Bun (adapted from Clone of a Cinnabon, from allrecipes.com)
- 1 cup warm milk
- 2 1/2 teaspoons dry yeast
- 1/2 cup white sugar
- 2 eggs, room temperature
- 1/3 cup canola oil
- 4 1/2 cups all-purpose flour
- 1 teaspoon salt
Filling
- ~225g prepared poppy-seed mix (look for ingredients like honey and citrus when buying)
- oil to glaze
Lemon Glaze
- 2/3 cup confectioners’ sugar
- 1 tablespoon of lemon juice (add more if you like!)
- dash of salt
- Add in milk, yeast and sugar together and leave for 5 minutes.
- Add in the rest of the bun ingredients into the yeast mixture and knead until a dough forms.
- Grease the bowl and dough lightly and let the dough rise for 1 hour, or until doubled.
- Beat down the dough and let rest for 10 minutes.
- Cut the dough into five portions and roll out each portion to 1/4 inch thickness.
- Lightly brush the top of the dough with oil.
- Spread the poppy-seed filling on the dough, then roll it up.
- Cut the dough into similar sized portions of buns.
- Place the buns into a greased pan (or pan lined with silicon), cover and let rise for 30 or more minutes (until doubled).
- Place the buns in a 375F oven for 15 to 20 minutes, until tops are golden brown.
- Mix all the ingredient for the lemon glaze into a small bowl and whisk with a fork. It does take a bit of effort but the sugar does dissolve eventually!
- When the buns are golden brown on top, take them out of the oven and cover them with the glaze.
- Let them cool and enjoy!
Note: If you keep them in a relatively air free area (I place the plate of them in a bag and tuck the opening of the bag underneath the plate) this will keep for a few days. They taste just as good on the third day as the first (if they last that long!).


